Easy Sender – Tutorial on how to use the group messaging function
Step 1: Click on the corner icon in the upper right corner of the browser

Step 2: Find the Easy Sender plugin and pin it to your browser
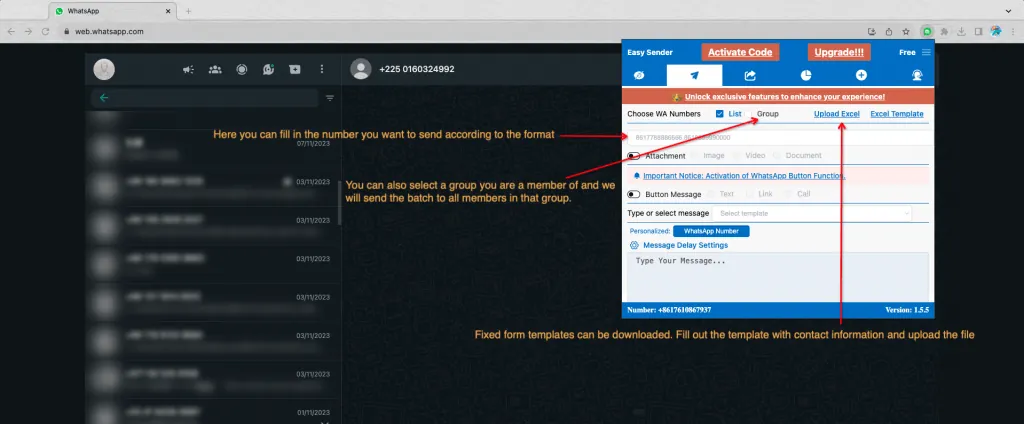
Step 3: You can choose different ways to add what needs to be sent
- You can also select a group you have joined, and we will send batches to all members in this group.
- Fixed form templates can be downloaded. Fill in the contact information in the template and then upload the file
- You can fill in the number you want to send here according to the format
Step 4: Select the message template you have created. The content in the message template is the content you send this time.
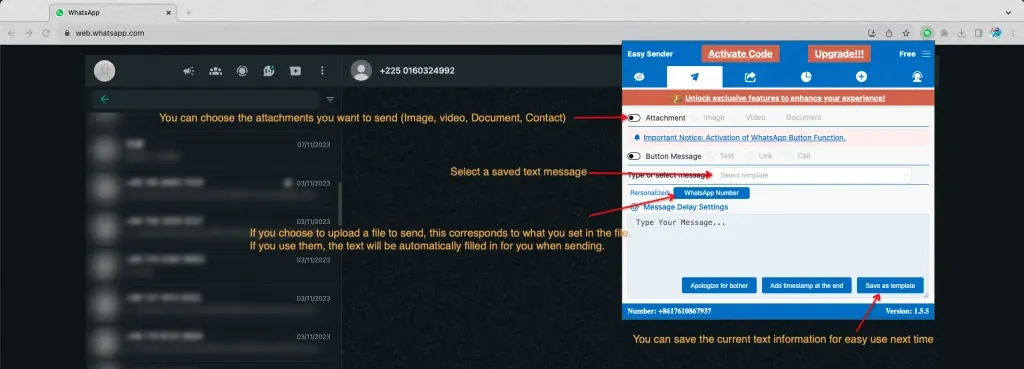
- You can choose the attachments you want to send (Image, video, Document, Contact)
- If you choose to upload a file to send, this corresponds to what you set in the file. If you use them, the text will be automatically filled in for you when sending.
- You can save the current text information for easy use next time
- Select a saved text message
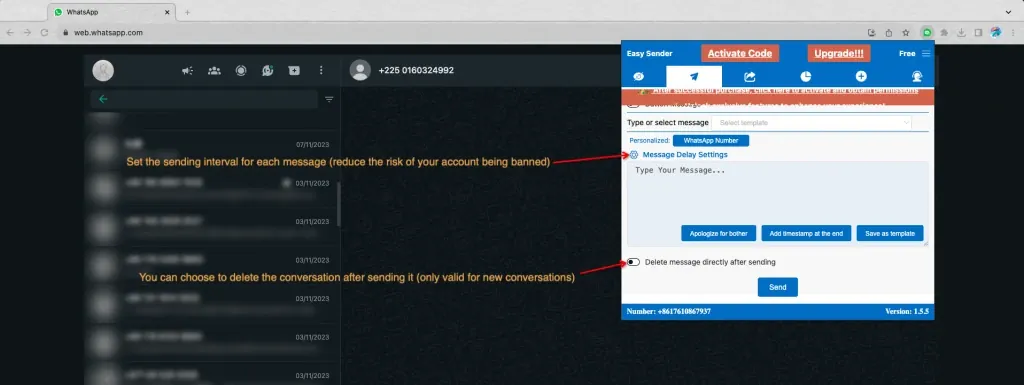
Step 5: Set interval && choose whether to delete new sessions
- You can choose to delete the conversation after sending it (only valid for new conversations)
- Set the sending interval for each message (reduce the risk of your account being banned)