User Guide|How to use Sender Extension
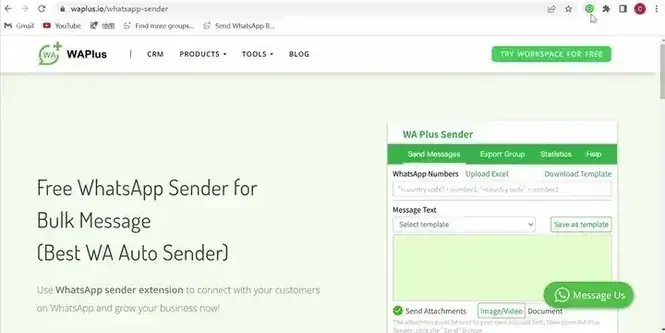
Sender Extension is a free, powerful, and easy-to-use extension for online Web WhatsApp, which can send WhatsApp bulk messages with only one operation. (Available on Chrome/Microsoft Edge browser).
How do I use Sender Extension?
How to use Send Messages
How to use Send Messages pro
How to use Personalized Field
How do I use Sender Extension?
#1 Install and pin Sender's icon in your browser
- You will notice an icon at the top right of your browser.
- When you click this icon, a menu will show a list of all the installed extensions.
- You need to click the icon next to WAPlus Sender.
- Once done, you will see the icon.
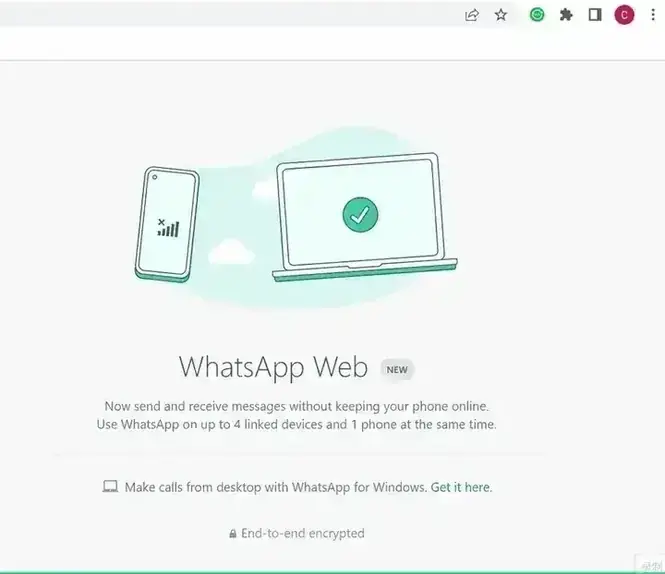
#2 Please log in on WhatsApp Web first
- Click the icon and link to WhatsApp Web.
- Open WhatsApp on your phone.
- Tap Menu on Android /Settings on iPhone and click "Linked Devices".
- Point your phone to this screen to capture the code.
#3 Click the icon at the top right of your browser
When you log into WhatsApp Web and click the icon at the top right of your browser, you will see the popup window. Now you can experience how efficient Sender is.
Send Messages
#1 Add WhatsApp Numbers manually, separated by commas.

#2 Edit your message.

#3 Click the 'Send' and keep WhatsApp Web open in your browser.

You're done! All messages will be sent one by one.
Send Messages Pro
#1: WhatsApp numbers
There are 3 ways for you to fill in WhatsApp numbers.
1-Manual entry
Enter the numbers you want to send the message to:
The format of the numbers: Country code in front, separate using comma, like: +19197646821,+8613119140503
2-Download excel
In the latest version, we support excel file upload, the steps:
①Download Excel Template
②Fill It
【1:Required】 WhatsApp Number(with country code) is required, please fill in the format: Country code in front, separate using comma 【2:Personalized】 Other columns are personalized fields and used to send personalized messages.
③Upload Excel

3-Select group
If you are in a group, you can use this feature:
- click the drop-down menu
- >> select the group you want to send the message
- >> then we will send messages to group members 1 by 1

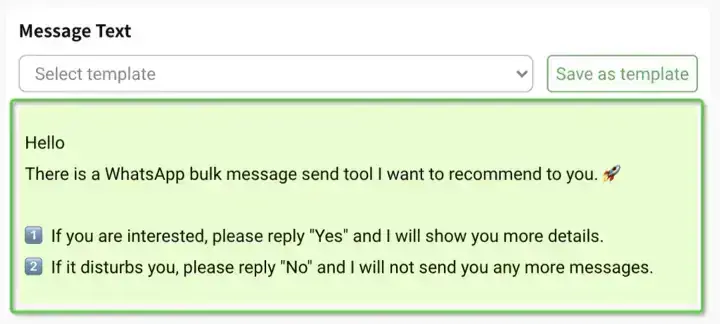
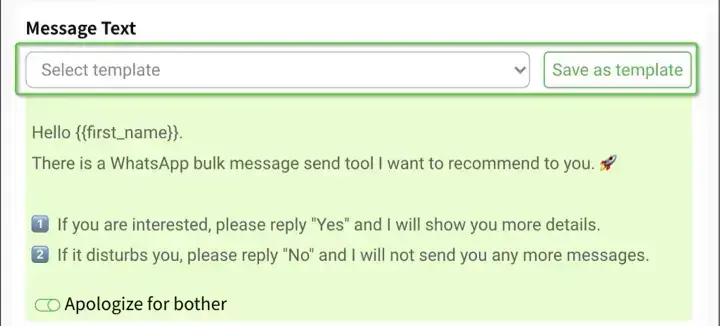
#2: Text editing
Send customized messages to your customers.
1-Add the text of your message
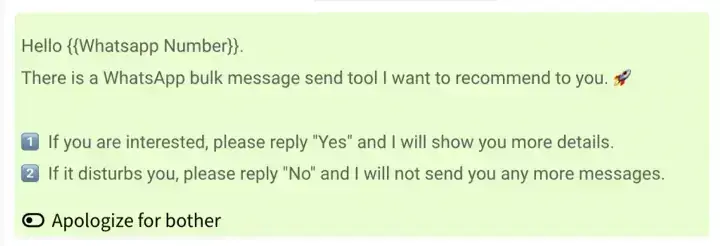
Enter the text of the message that you'd like to send.
We have prepared an apology copy for you, which is used to improve the goodwill of the recipient of the message, you can choose to use it or not.

2-Using txt template
You can choose to use a historical template, or click to save the current template.

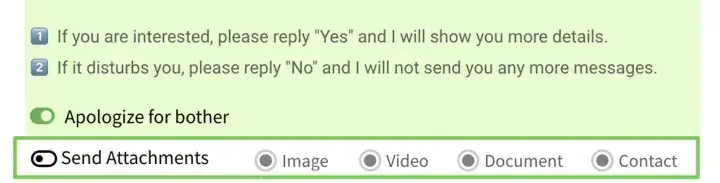
3-Add Attachment
You could add an attachment like an image, video, or document.
- Click on 'Send Attachments'
- >> Click on 'Image/Video' or 'Document' or 'Contact'
- >> Select the file you'd like to send
- >> The first message would be sent to you itself
- >> Once it is sent, check it and open the extension
4-Personalized Field
①Download Excel Template
②Fill It
With Excel, you could add as many personalized fields as you want.
③Upload Excel
Now you could click to insert them anywhere in your message.
It will be displayed like (same as you fill in excel):
#3: Click the 'Send'.
You're done! All messages will be sent one by one.